
Pinpoint the recurring failure
Lots of projects start with the same question: why does paint lift, flake, or bead on rubber? Treat that failure as a problem to solve, not a mystery. Ask whether the substrate is flexible, whether old coatings were removed, and whether the product chosen matches rubber’s needs—basic checks that tell you whether to proceed or to rework. If you’re wondering about compatibility straight away, this quick primer answers common queries like does spray paint stick to rubber while you diagnose the root cause.
Define the practical objective
Decide what success looks like: a flexible finish that stays attached through bending and weathering, or a short-term color refresh. That choice directs material and process selection. When you pick low-VOC options, expect trade-offs in cure time and flexibility—plan for that. State the expected lifetime up front so service intervals and inspection points make sense.
Preparation steps that prevent failure
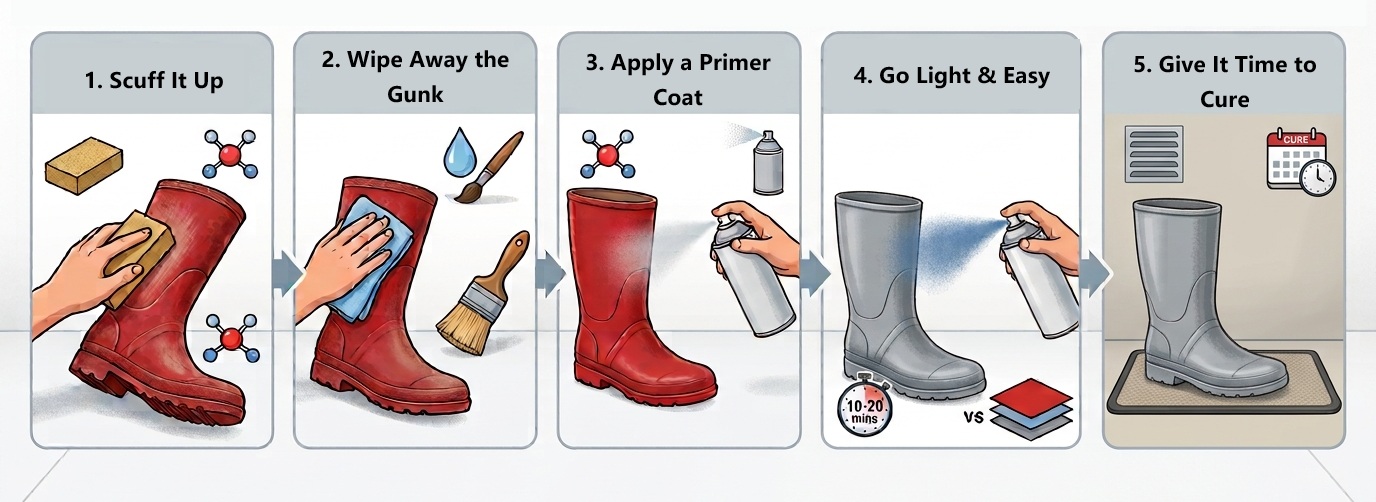
Surface prep determines whether a job lasts. Clean thoroughly with a solvent compatible with rubber, degloss with fine abrasive or chemical etch suited to the compound, and remove oils or release agents. Use a tack cloth only after the surface is fully dry. Test adhesion on a small, inconspicuous area; a quick peel test tells you more than assumptions. Don’t skip primer if the manufacturer specifies one for elastomeric substrates.
Choose materials and application technique
Select coatings rated for elasticity and adhesion to elastomers. Spray technique matters: thin, even coats with proper flash time beat fewer, heavy passes. Maintain recommended temperature and humidity; low-VOC formulas can be slower to coalesce, so give them time between coats. Masking must allow movement—rigid tape on flexible trim causes edges to lift when the part flexes.
Real-world grounding and proven resources
Repair shops in Detroit’s collision-refinish sector routinely test elastomer coatings against real vehicle use, which highlights common pitfalls like improper primer choice and inadequate cure. For product guidance and compatibility data, many technicians refer to detailed tests and specifications for spray paint for rubber that compare tack, elongation, and solvent resistance—metrics that predict field performance.
Common mistakes and how to fix them
People often apply paint too thick, skip primer, or cure under poor conditions. If the coating cracks after flexing, strip back to bare rubber and repeat prep with a flexible primer and an elastomeric topcoat. If blushing or poor film formation appears, allow longer flash and warmth per product data. Keep records: note batch numbers, drying times, and ambient conditions so you can trace issues and refine the process.
Plan routine inspection and service intervals
Set inspection checkpoints based on the objective you defined. For long-term finishes check adhesion and surface integrity at 3, 12, and 24 months; for short-term cosmetic work, a single 6–8 week inspection may suffice. Replace compromised sections rather than patching over failed adhesion—the underlying bond needs correction, not cosmetic cover-ups.
Summation and practical next step
Treat paint failures as process errors you can correct: define objectives, prepare the surface, choose elastic-compatible low-VOC products, validate with a small test, and log results so the next job improves. For specification details and technical data that align with these steps, refer to product documentation from SANVO which maps formulation properties to the practical checks described above.