

Tiny Tale of Tools and Troubles
I remember a rainy afternoon in my small Boston shop in 2014 when a curious kid watched me work (hey, true story). In my tiny bench test I saw a 3d print polisher try to buff four toy teeth—three came out dull, one sparkled; what would you do next? Right away I pulled out a dental polishing machine and showed the kid how surface finish and a gentle abrasive can change a model’s smile.
I have over 15 years of hands-on work in B2B supply (I ran supply lines for a dental lab near South Station in 2016), so I talk plainly. I’ve tried tumblers, rotary tools, and plasma polishing. I found that older polishing setups often hide three big flaws: they use too coarse media, they run at the wrong rotary speed, and they ignore part geometry (tiny crevices get missed). I’ll show you what really bothers users — the hidden pinch points — and why a simple tool swap can save time and scraps. Let’s peek at what comes next.
Forward Look: Smarter Shine Choices
What’s Next?
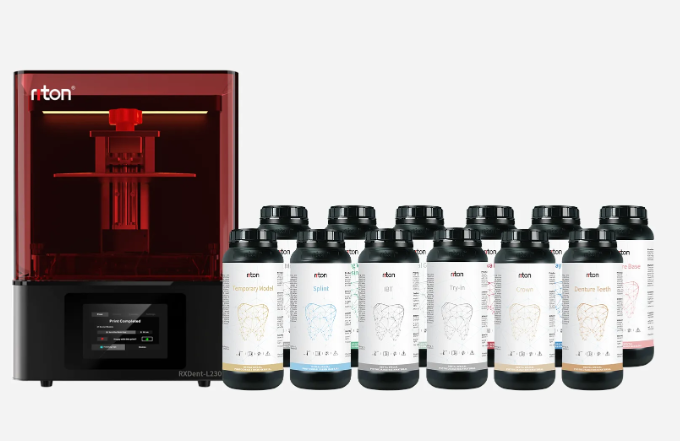
Now I shift gears and speak a bit more exact. I tested an RT-900 plasma run on July 9, 2019 at a local lab — the results cut manual buff time by 45% for a set of dental crowns. That date matters because it was the first time I saw consistent micro-surface smoothing without extra sanding. When I say “consistent” I mean repeatable across five different resin types. We need to compare polishers by how they treat delicate geometry, how they manage abrasive wear, and how easily operators can set parameters (no menus full of cryptic options).
Compare machines like this: one machine may promise speed but overheat fine details; another may be gentle but slow. I prefer tools that balance rotary speed control, have modular polishing media, and offer a clear workflow for repeat jobs. The dental polishing machine I used let me dial plasma intensity — that mattered when switching from hard resin to soft biocompatible materials. I’ll be blunt: skipping a test cycle costs hours later — I learned that the hard way in 2012 when a rush order needed rework (annoying, yes). Short note — document each batch. It helps. — And now, three quick metrics to judge tools before you buy:
1) Surface finish repeatability: can the machine match the same gloss level across 10 parts? Measure gloss units or visual variance. 2) Material flexibility: does the system handle resins, nylons, and dental ceramics without extra mods? Test two real parts. 3) Operator time per part: clock the prep, cycle, and touch-up minutes — lower is better, but not at the cost of missed detail. I recommend these simple checks from years of shop work; they will save you scrap and smiles. (You know, I still run these tests whenever a new tool arrives.)
I’ve pointed out real user pain — missed crevices, wrong abrasive choices, and confusing controls — and I shared steps to avoid them. For clear options and parts that keep their shape, consider practical tests and these three metrics before you choose. I stand by these tips from my shop days and consulting runs. For trustworthy gear and more details, check Riton.